A feature wall is one of the most effective ways to add personality and depth to a room. Whether you are adding a bold colour, a subtle contrast or a textured finish, a well-executed feature wall can completely transform a space. The good news is that with the right preparation and technique, painting a feature wall is a straightforward project.
Here is a complete step by step guide to painting a feature wall in your Perth home.
Choosing the Right Wall for a Feature Wall
Not every wall in a room is suited to being a feature wall. The best choices are:
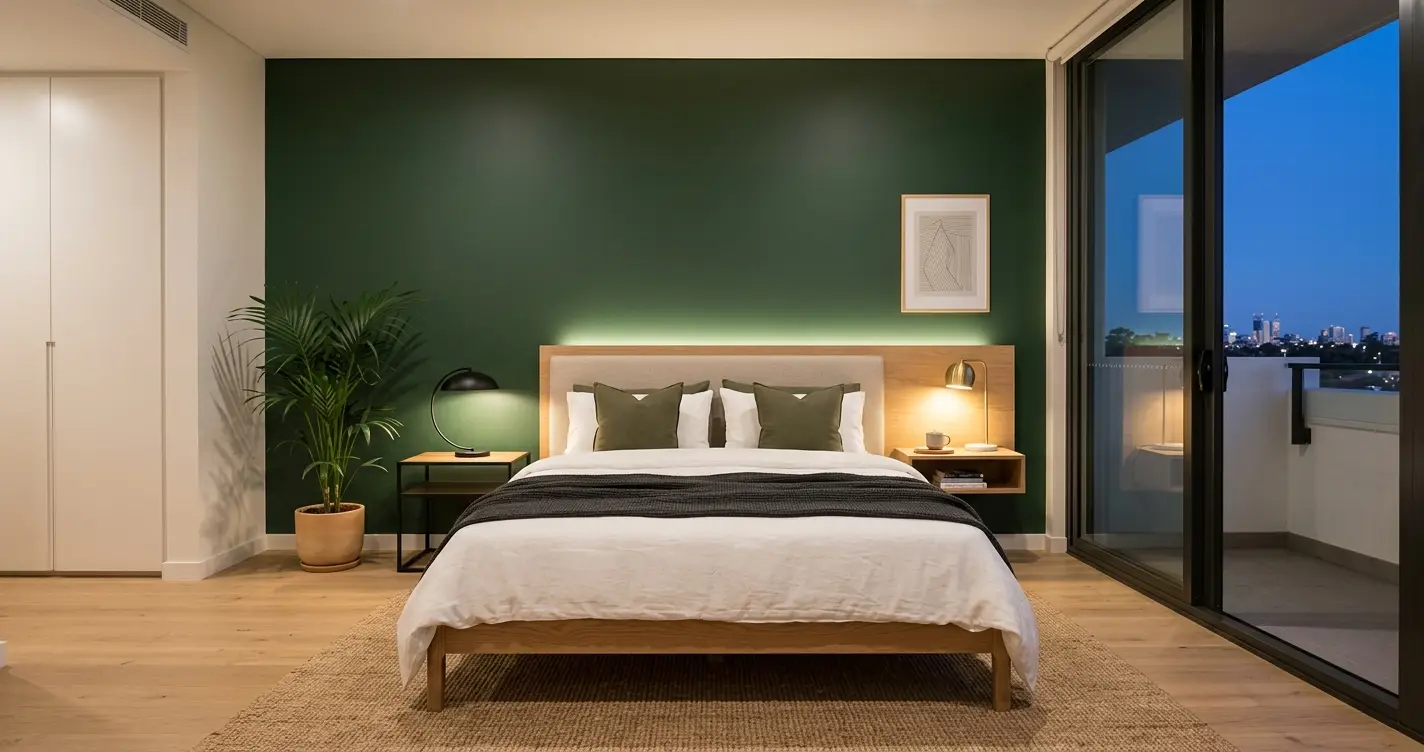
- The wall behind the bed in a bedroom — the most popular choice and visually the most impactful
- The wall behind the sofa or TV in a living room — anchors the main seating area
- The wall at the end of a hallway — draws the eye and adds depth to a narrow space
- The wall with the fireplace or main architectural feature — highlights the focal point of the room
Avoid choosing a wall with lots of doors, windows or interruptions as these break up the impact of the feature colour. A solid, uninterrupted wall gives the best result.
Choosing the Right Colour for a Feature Wall
Colour selection is the most important decision when planning a feature wall. A few principles to guide your choice:
- The feature wall colour should complement the other walls rather than clash with them. A darker or more saturated version of the main wall colour works well.
- Consider the natural light in the room. Dark colours in a room with limited natural light can feel oppressive rather than dramatic.
- Test the colour with a sample pot before committing. Paint a large square on the actual wall and observe it at different times of day before making a final decision.
- Consider the furniture and soft furnishings in the room. The feature wall colour should work with what is already in the space.
Popular feature wall colours in Perth homes currently include deep greens, warm terracotta tones, navy, charcoal and rich earthy neutrals.
What You Need to Paint a Feature Wall
Before you start, gather everything you need:
- Feature wall paint — one to two litres for a standard bedroom or living room wall
- Roller and roller tray
- Angled brush for cutting in along edges
- Masking tape
- Drop sheets to protect floors and furniture
- Sugar soap or wall cleaner
- Filler and sandpaper for any holes or imperfections
- Primer if painting a dark colour over a light existing colour
Step by Step: How to Paint a Feature Wall
Step 1 — Prepare the Surface
Good preparation is the difference between a professional result and a DIY-looking one. Start by cleaning the wall with sugar soap to remove any dust, grease or marks. Fill any holes or cracks with filler, allow to dry, then sand smooth. Wipe away any dust with a damp cloth and allow the wall to dry completely before painting.
Step 2 — Protect the Room
Lay drop sheets on the floor along the wall. Move furniture away from the wall or cover it. Apply masking tape along the ceiling line, along the skirting board and along any adjacent walls where the feature colour meets a different colour. Take your time with this step — clean lines make the biggest difference to the final result.
Step 3 — Apply Primer if Needed
If you are painting a dark or saturated colour over a light existing colour, apply a tinted primer first. This reduces the number of topcoats needed and ensures even coverage. If you are painting a mid-tone colour over an existing colour in reasonable condition, you can skip the primer and go straight to the topcoat.
Step 4 — Cut In Along the Edges
Using an angled brush, carefully paint along the edges of the wall — along the ceiling line, down the corners and along the skirting board. This is called cutting in. Take your time and use a steady hand. The masking tape will protect adjacent surfaces but the quality of your cut in line will determine how clean the edges look.
Cut in a section at a time rather than cutting in the entire wall before rolling. This ensures the cut in edge blends with the rolled section while still wet, avoiding a visible join.
Step 5 — Roll the Wall
Load the roller with paint and apply to the wall using a W or M shaped motion to distribute the paint evenly before rolling out in straight strokes. Work in sections from top to bottom. Keep a wet edge as you go to avoid roller marks and lap lines.
Apply the first coat evenly and allow to dry for at least two hours before applying the second coat.
Step 6 — Apply the Second Coat
Once the first coat is fully dry, apply a second coat using the same technique. The second coat fills any thin spots and gives a rich, even finish. Two coats is the minimum for a quality result on a feature wall.
Step 7 — Remove Masking Tape
Remove the masking tape while the paint is still slightly tacky rather than fully dry. Pull the tape back at a 45 degree angle slowly and steadily. Removing tape when the paint is fully dry can cause the paint edge to crack or lift.
Step 8 — Touch Up if Needed
Once the tape is removed inspect the edges for any bleed or imperfections. Use a small brush to touch up any areas that need attention. Stand back and assess the wall in different lighting conditions before deciding if any further touch-ups are needed.
Common Feature Wall Mistakes to Avoid
- Skipping surface preparation — marks and imperfections will show through even dark paint
- Not testing the colour on the actual wall before buying a full tin
- Using a cheap roller that leaves texture marks in the finish
- Removing masking tape too late and cracking the paint edge
- Applying one thick coat instead of two thin coats
- Not cutting in carefully along edges, resulting in wavy lines
Should You Hire a Professional Painter for a Feature Wall?
A feature wall is one of the simpler painting projects a homeowner can take on themselves. However if you want a perfect result with clean edges, even coverage and the right colour advice, a professional painter will deliver a noticeably better finish in a fraction of the time.
Professional painters have the tools, experience and product knowledge to ensure your feature wall looks exactly as intended. We also carry a full range of Dulux and Solver colour samples and can advise on colour selection before any paint is purchased.
Professional Interior Painting in Perth
Auzz Painting Service provides professional interior painting throughout Perth including feature walls, full room repaints and whole home interior painting. With over 20 years of experience and more than 140 five-star Google reviews, we deliver high quality results on every job.
Call 0474 157 273, email info@auzzpaintingservice.com.au or fill in our contact form and we will get back to you within one business day.
Frequently Asked Questions
Popular feature wall colours in Perth homes include deep greens, warm terracotta tones, navy, charcoal and rich earthy neutrals. The best choice depends on the existing colours in the room, the natural light and your personal preference. We recommend testing a sample on the actual wall and observing it at different times of day before committing to a full tin.
Two coats is the minimum for a quality feature wall finish. For dark or saturated colours, a tinted primer followed by two topcoats is recommended for full, even coverage. Applying one thick coat instead of two thin coats leads to an uneven finish and longer drying times.
In a bedroom the wall behind the bed is the most popular and impactful choice for a feature wall. It anchors the bed as the focal point of the room and is the first thing you see when you enter. Choose a solid wall without windows or doors for the best result.
A standard feature wall including preparation, two coats and cleanup typically takes three to four hours for a professional painter. A DIY approach will take longer depending on experience. Allow at least two hours drying time between coats.
Yes. We paint feature walls throughout Perth as part of our interior painting service. Whether you want a single feature wall or a full room repaint, we provide the same high standard of preparation and finish on every job. Call 0474 157 273 or fill in our contact form for a free quote.